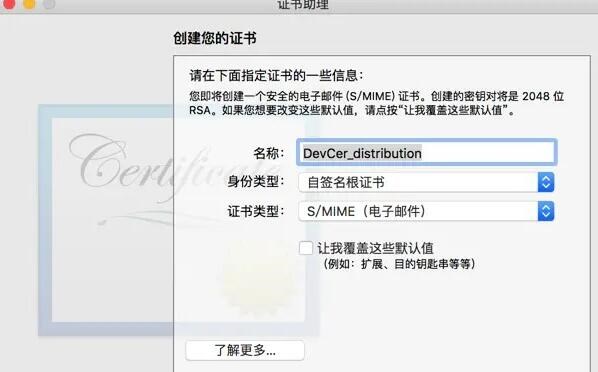
在 iOS 应用开发中,https 协议的使用越来越普遍。而在使用 https 协议时,我们通常需要使用证书来保证数据传输的安全性。一般情况下,我们会从第三方机构购买证书,但是在一些特殊情况下,我们可能需要自己生成证书,这就需要使用自签名证书。
自签名证书是由自己生成的证书,它没有被任何第三方机构认证过,因此在使用时需要用户手动信任。在 iOS 开发中,我们可以使用 OpenSSL 来生成自签名证书。
首先,我们需要安装 OpenSSL 工具。可以使用 Homebrew 进行安装:
```
brew install openssl
```
安装完成后,我们就可以使用 OpenSSL 来生成自签名证书了。下面是一个生成自签名证书的命令:
```
openssl req -new -x509 -keyout server.key -out server.crt -days 365 -nodes
```
这个命令会生成一个有效期为一年的自签名证书。其中,`server.key` 是证书的私钥文件,`server.crt` 是证书文件。在生成证书时,需要填写一些信息,如下:
```
Country Name (2 letter code) []:CN
State or Province Name (full name) []:
Locality Name (eg, city) []:
Organization Name (eg, company) []:
Organizational Unit Name (eg, section) []:
Common Name (eg, fully qualified host name) []:
Email Address []:
```
其中,Common Name 是证书的域名,可以填写自己的域名或者 IP 地址。
生成证书后,我们需要在 Xcode 中将证书添加到项目中。首先,在 Keychain Access 中导入证书:
1. 在 Keychain Access 中选择 File -> Import Items。
2. 选择刚刚生成的证书文件 `server.crt`,并将证书添加到系统钥匙串中。
然后,在 Xcode 中将证书添加到项目中:
1. 在 Xcode 中选择项目文件,进入项目设置。
2. 在 General 标签页中,向下滚动到 App Transport Security Settings 选项。
3. 在 App Transport Security Settings 中添加一个 Exception Domain,将域名设置为刚刚生成证书时填写的 Common Name。
4. 在 App Transport Security Settings 中添加一个 NSExceptionAllowsInsecureHTTPLoads,将其设置为 YES。
5. 在 App Transport Security Settings 中添加一个 NSExceptionRequiresForwardSecrecy,将其设置为 NO。
6. 在 Build Settings 中搜索 `Other Linker Flags`,并添加 `-ObjC`。
最后,在代码中使用证书:
```objective-c
NSURLSessionConfiguration *config = [NSURLSessionConfiguration defaultSessionConfiguration];
config.URLCredentialStorage = [NSURLCredentialStorage sharedCredentialStorage];
NSURLSession *session = [NSURLSession sessionWithConfiguration:config delegate:self delegateQueue:nil];
NSURL *url = [NSURL URLWithString:@"https://yourhostname.com"];
NSURLSessionDataTask *task = [session dataTaskWithURL:url];
[task resume];
```
在使用证书时,需要实现 NSURLSessionDelegate 协议中的一些方法:
```objective-c
- (void)URLSession:(NSURLSession *)session didReceiveChallenge:(NSURLAuthenticationChallenge *)challenge completionHandler:(void (^)(NSURLSessionAuthChallengeDisposition, NSURLCredential *))completionHandler {
if ([challenge.protectionSpace.authenticationMethod isEqualToString:NSURLAuthenticationMethodServerTrust]) {
NSURLCredential *credential = [NSURLCredential credentialForTrust:challenge.protectionSpace.serverTrust];
completionHandler(NSURLSessionAuthChallengeUseCredential, credential);
} else {
completionHandler(NSURLSessionAuthChallengePerformDefaultHandling, nil);
}
}
```
在这个方法中,我们需要判断当前的认证方式是否为服务器信任,如果是,则使用服务器信任的方式完成认证。
总结一下,使用自签名证书需要以下几个步骤:
1. 使用 OpenSSL 工具生成证书。
2. 在 Keychain Access 中导入证书。
3. 在 Xcode 中将证书添加到项目中。
4. 在代码中使用证书,并实现 NSURLSessionDelegate 协议中的方法。
使用自签名证书虽然比较麻烦,但也是一种可行的方案。在一些特殊情况下,如开发阶段或者内网环境中,使用自签名证书可以方便快捷地进行 https 通信。


